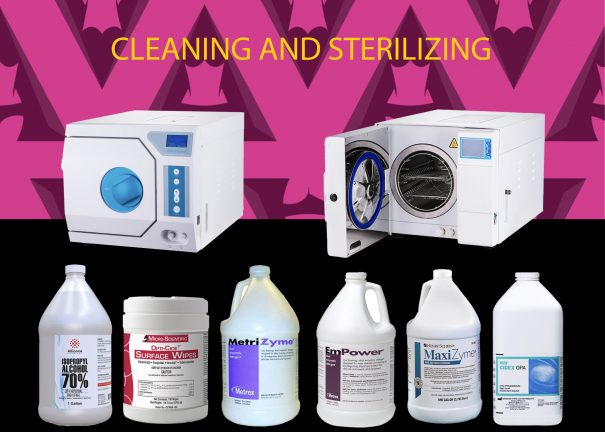
Cleaning is the removal of foreign material (soil, organic material) from objects and is normally accomplished using water with detergents or enzymatic products (MaxiZyme, Metrizyme, Empower). Thorough cleaning is required before disinfection and sterilization.
Disinfection describes a process that eliminates pathogenic microorganisms, except bacterial spores, on inanimate objects.
Sterilization describes a process that destroys or eliminates all forms of microbial life.
Unlike sterilization, disinfection is not sporicidal.
The term germicide includes both antiseptics and disinfectants. Antiseptics are germicides applied to living tissue and skin; disinfectants are antimicrobials applied only to inanimate objects. In general, antiseptics are used only on the skin and not for surface disinfection, and disinfectants are not used for skin antisepsis because they can injure skin and other tissues.
The effective use of disinfectants is part of a multi-barrier strategy to prevent health-care–associated infections. Surfaces are considered noncritical items because they contact intact skin. Use of noncritical items or contact with noncritical surfaces carries little risk of causing an infection in patients or staff. Nonetheless, cleaning and disinfecting surfaces is common practice and should be routinely practiced.
Surgical instruments should be presoaked to prevent drying of blood, and to soften and remove blood/fat from the instruments. Cleaning may be done manually, by rubbing/scrubbing the soiled area with a brush to remove any blood, fat, or any other organic material from the surface, using water with detergents or enzymatic products, or mechanically, by using automatic cleaners such as ultrasonic cleaners, washer-de-contaminators, washer-disinfectors, and washer-sterilizers.
For instrument cleaning, a neutral or near-neutral pH detergent solution containing enzymes commonly is used because such solutions are active on blood/fat/carbohydrates providing good soil removal. Enzymatic cleaners are not disinfectants and as with all chemicals, enzymes must be rinsed from the equipment. Enzyme solutions should be used in accordance with manufacturer’s instructions, which include proper dilution of the enzymatic detergent and contact with equipment for the amount of time specified on the label.
Many disinfectants (alcohol, glutaraldehyde (Cydex), hydrogen peroxide) are used alone or in combinations.
Steam sterilization, moist heat in the form of saturated steam under pressure, is the most widely used and the most dependable method of surgical sterilization. Steam sterilization is nontoxic, inexpensive, rapidly microbicidal, sporicidal, and rapidly heats and penetrates fabrics. The basic principle of steam sterilization, as accomplished in an autoclave, is to expose each item to direct steam contact at the required temperature and pressure for the specified time.
There are four (4) parameters of steam sterilization: steam, pressure, temperature, and time. The ideal steam for sterilization is dry saturated steam and entrained water. Pressure serves as a means to obtain the high temperatures necessary to quickly kill microorganisms. Specific temperatures must be obtained to ensure the microbicidal activity. The two common steam-sterilizing temperatures are 121°C (250°F) and 132°C (270°F). These temperatures (and other high temperatures) must be maintained for a minimal time to kill microorganisms. At constant temperatures, sterilization times vary depending on the type of item (metal versus rubber, plastic), whether the item is wrapped or unwrapped, and the sterilizer type.
The two basic types of steam sterilizers (autoclaves) are the gravity displacement autoclave and the high-speed pre-vacuum sterilizer. Refer to the autoclave’s manual of operation for the type of steam sterilizer and the minimum cycle times for steam sterilization cycles.
Flash steam sterilization refers to sterilization of an unwrapped object and it depends on the type of sterilizer and the type of item (porous vs non-porous items). Although the wrapped method of sterilization is preferred, correctly performed flash sterilization is an effective process for the sterilization of critical medical devices.
Flash sterilization is a modification of conventional steam sterilization in which the flashed item is placed in an open tray to allow for rapid penetration of steam. It is not recommended as a routine sterilization method because of the lack of timely biological indicators to monitor performance, absence of protective packaging following sterilization, possibility for contamination of processed items during transportation to the operating rooms, and the sterilization cycle parameters (time, temperature, pressure) are minimal.
Flash sterilization is considered acceptable for processing cleaned patient-care items that cannot be packaged, sterilized, and stored before use. It also is used when there is insufficient time to sterilize an item by the preferred package method. Refer to the autoclave’s manual of operation for the type of steam sterilizer and the minimum cycle times for flash steam sterilization cycles.
Taking the time, putting the effort and following the appropriate guidelines of cleaning and sterilization will ensure the safety of all, patients and medical personnel.
Cleaning and sterilization of surgical instruments and disinfection of surfaces = Patient Safety! Connect with us at dravellanet.com.